Wall-to-Tile Installation Guide | |
| The Wall to Tile runs along a wall with a wall at one end and a tile or shower screen at the other. This installation guide details how to install from a wall to a tile. Please download the full PDF for your convenience: Wall to Tile - Inverted Tile Install Guide Enquire Now | 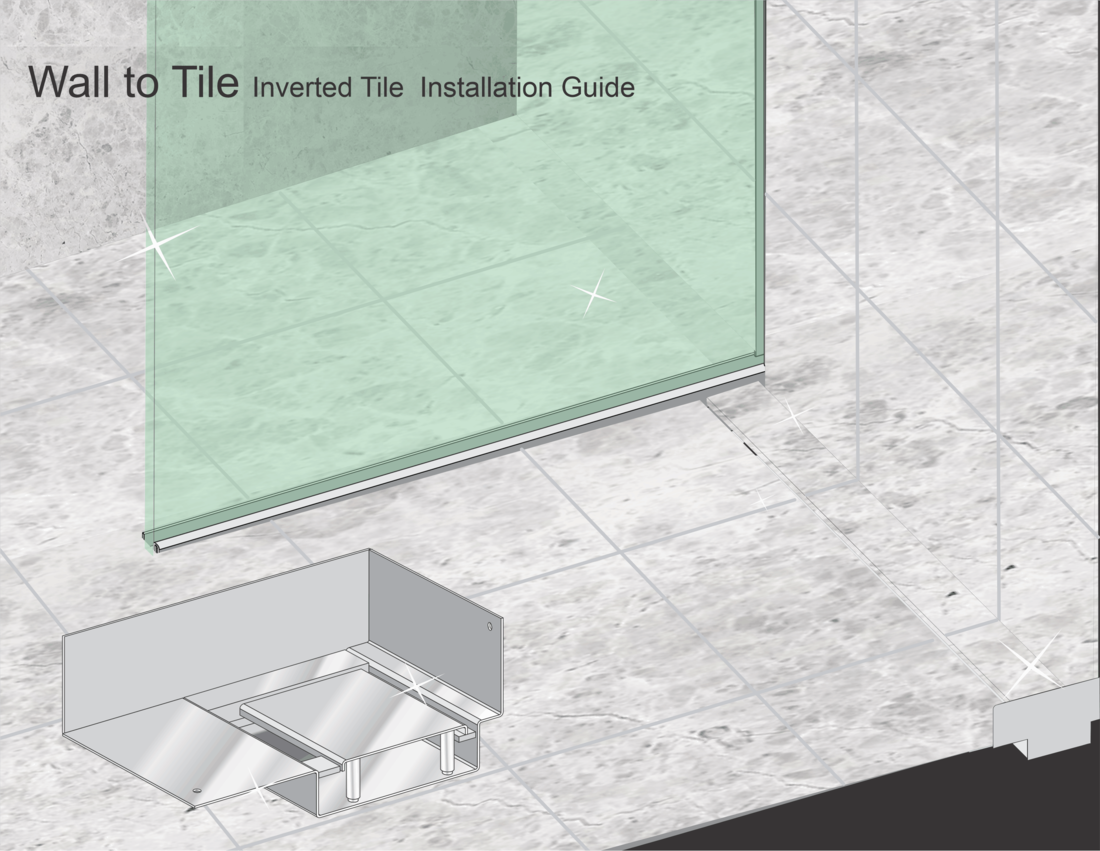 |
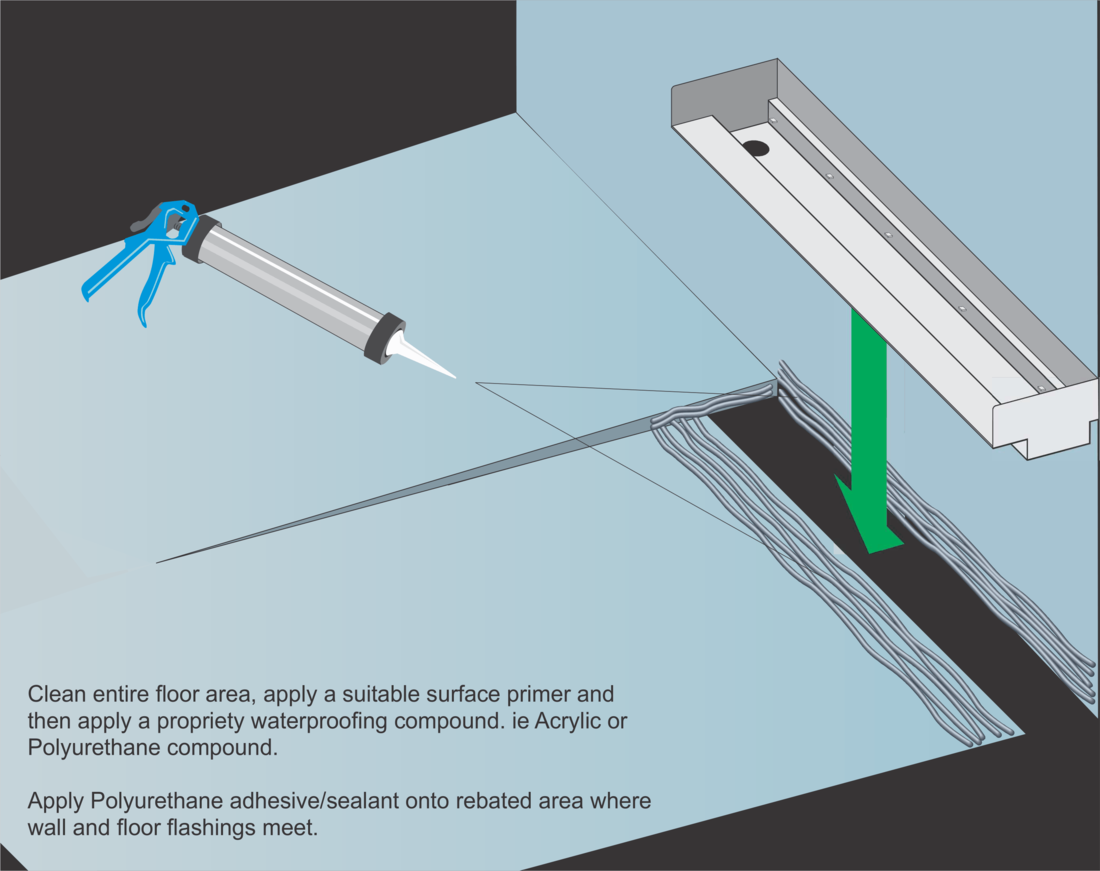
Step 1
Clean entire floor area, apply a suitable surface primer and then apply a propriety waterproofing compound ie acrylic or polyurethane compound.
Apply polyurethane adhesive/sealant onto the rebated area where wall and floor flashings meet.
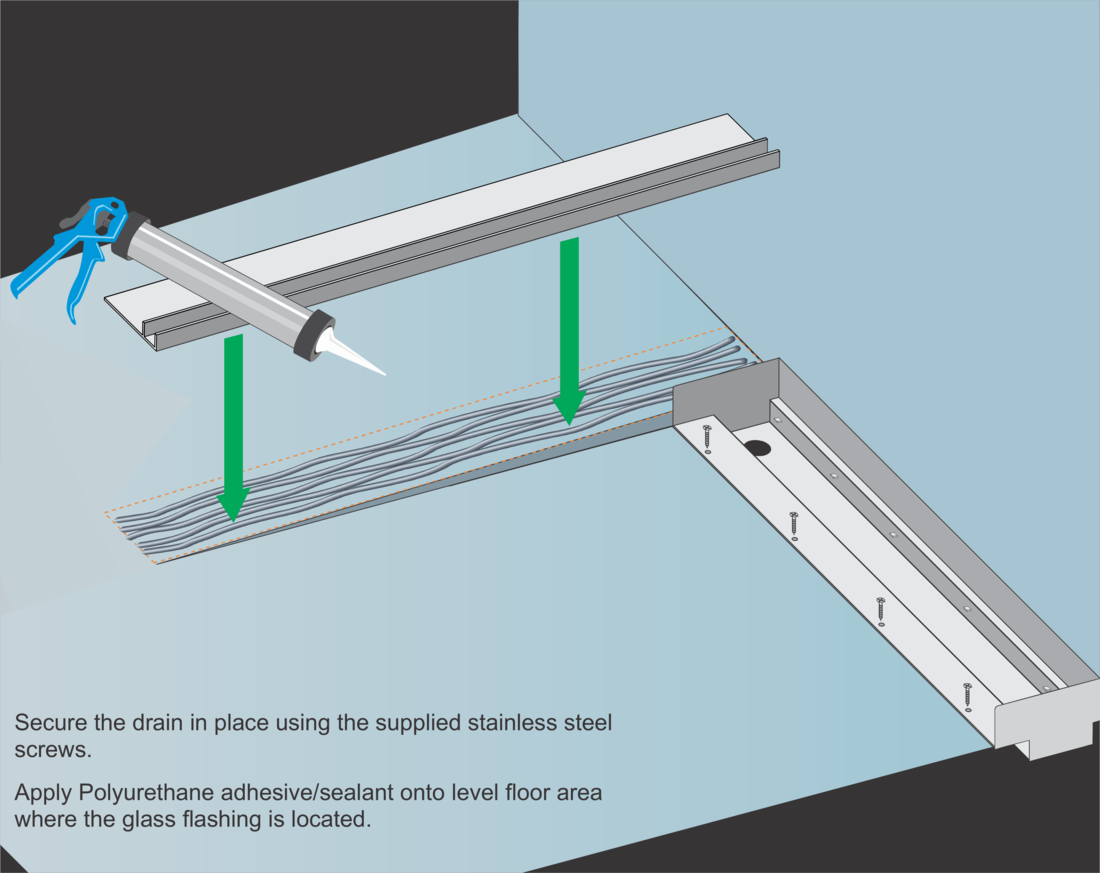
Step 2
Screw the drain in please using the supplied stainless steel screws.
Apply polyurethane adhesive/sealant onto the level floor area where the glass flashing is located.
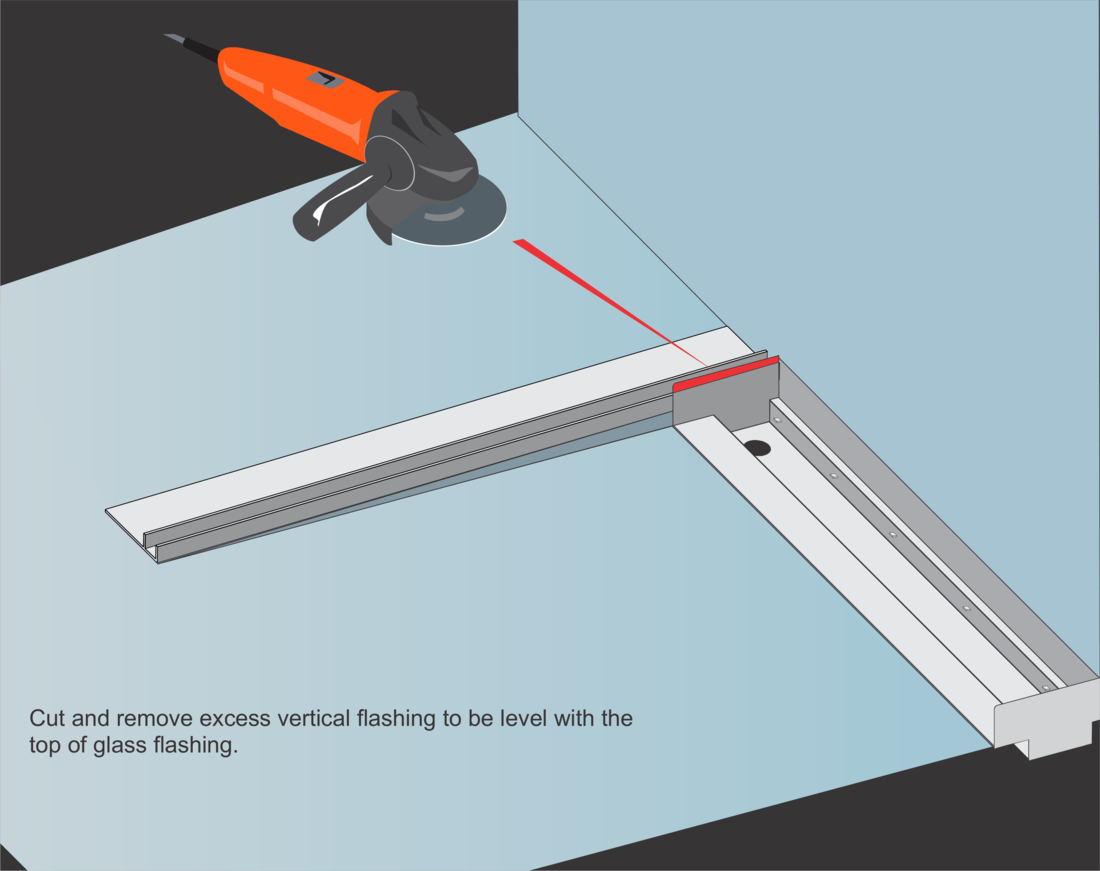
Step 3
Cut and remove excess vertical flashing to be level with the glass flashing.
Step 4
Apply Polyurethane adhesive/sealant onto the level floor area where the graded flashing is located.

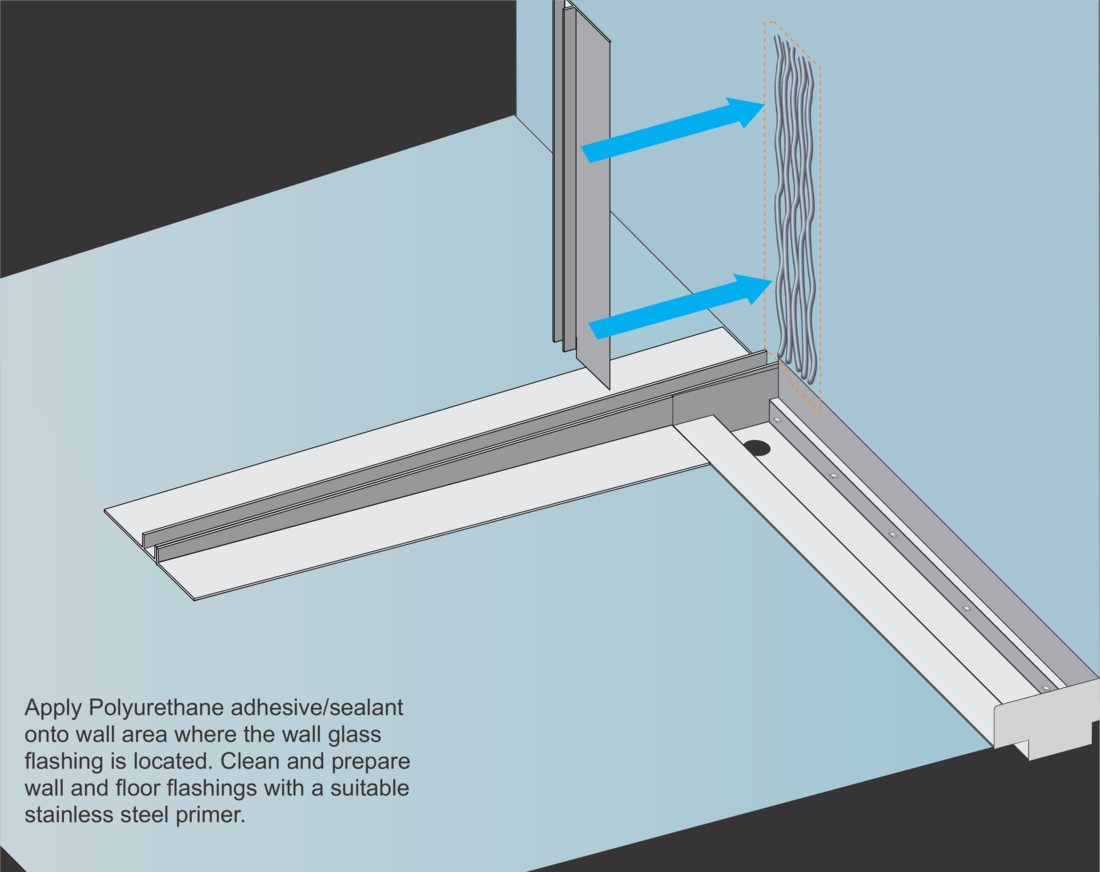
Step 5
Apply Polyurethane adhesive/sealant onto the wall area where the wall glass flashing (HF Flashing) is located. Clean and prepare wall and floor flashings with a suitable stainless steel primer.
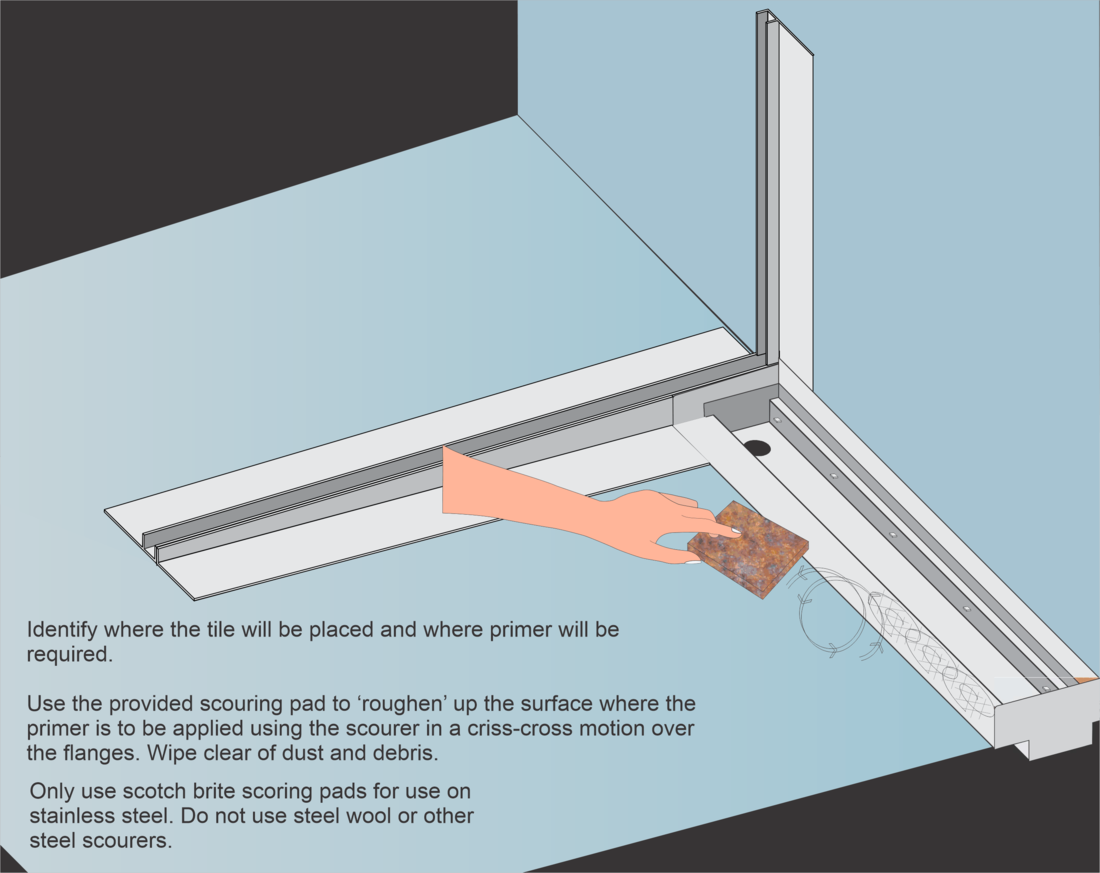
Step 6
Identify where the tile will be placed and where the primer will be required.
Use the provided scouring pad to 'roughen' up the surface where the primer is to be applied using the scourer in a criss-cross motion over the flanges. Wipe clear of dust and debris.
Only use scotch brite scouring pad for use on stainless steel or other steel scourers.
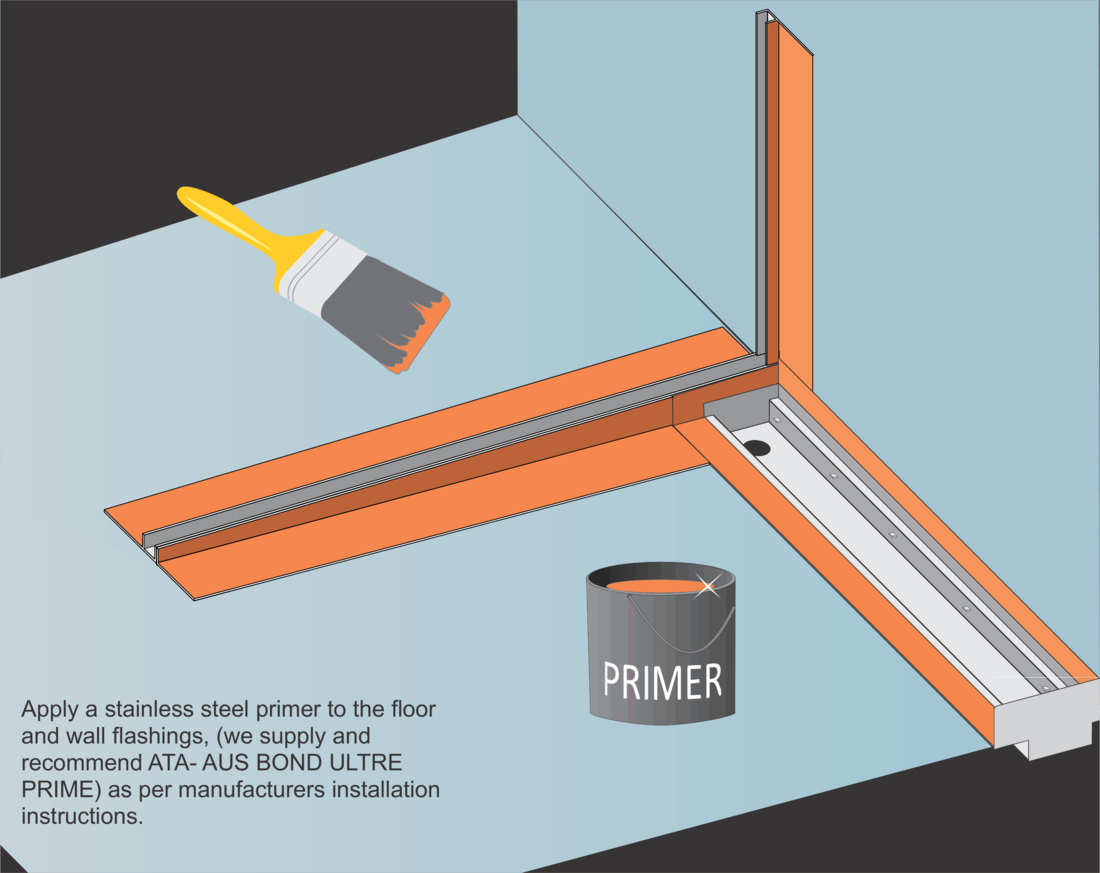
Step 7
Apply a stainless steel primer to the floor and wall flashings, (we supply and recommend ATA-AUS BOND ULTRE PRIME) as per manufacturers installation instructions.
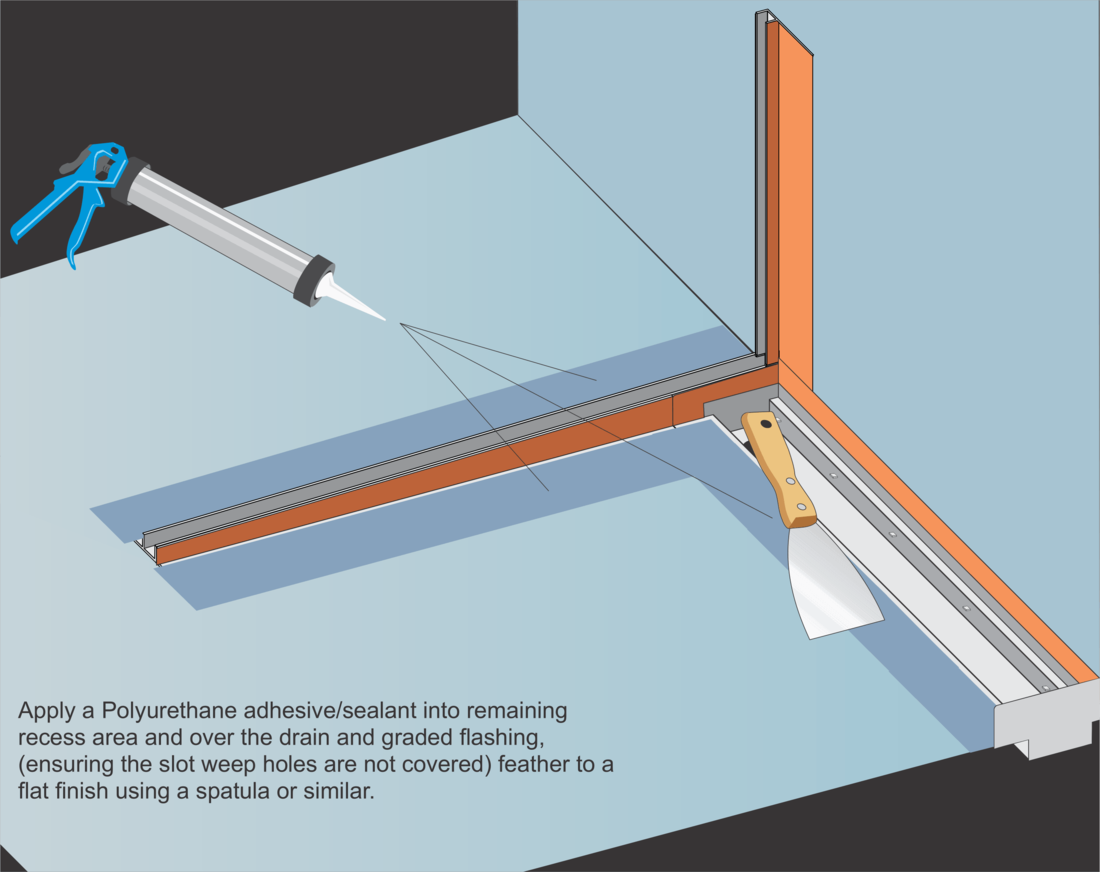
Step 8
Apply a Polyurestance adhesive/sealant into remaining recess area and over the drain and graded flashing, (ensuring the slot weep holes are not covered) feather to a flat finish using a spatula or similar.
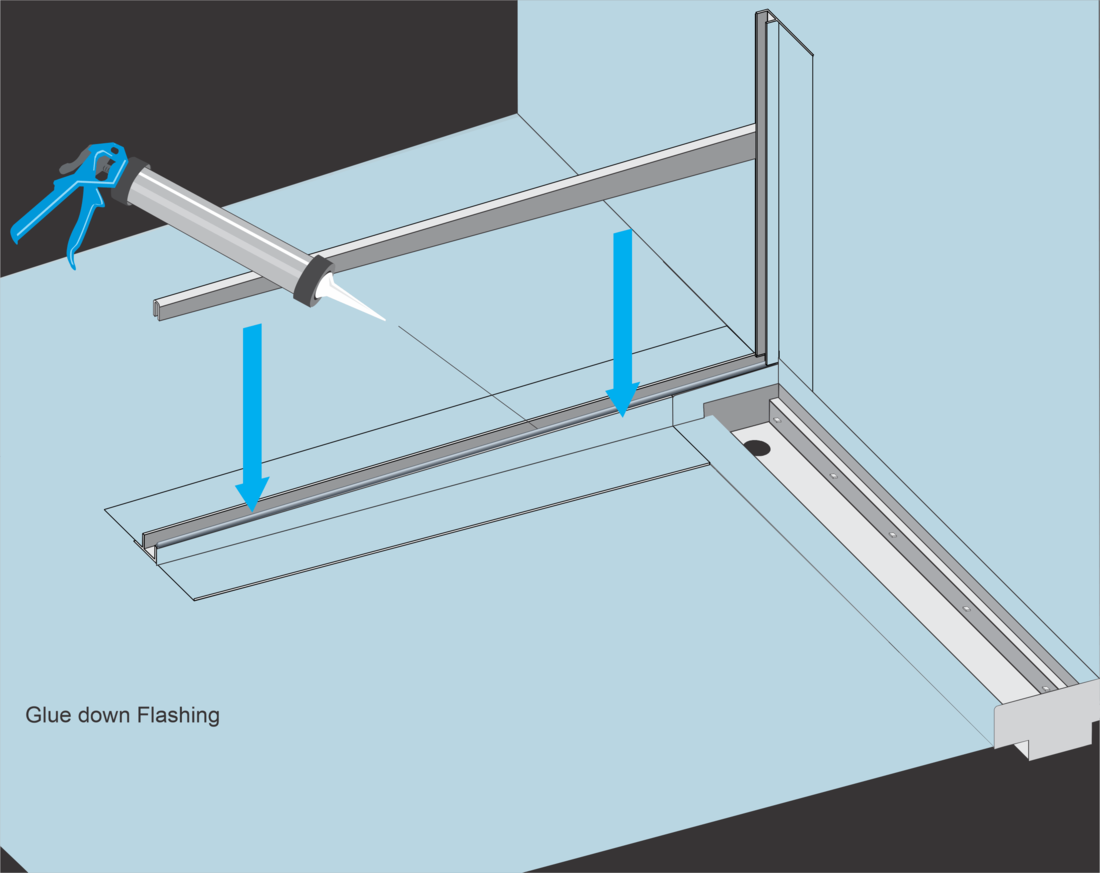
Step 9
Glue down flashing.
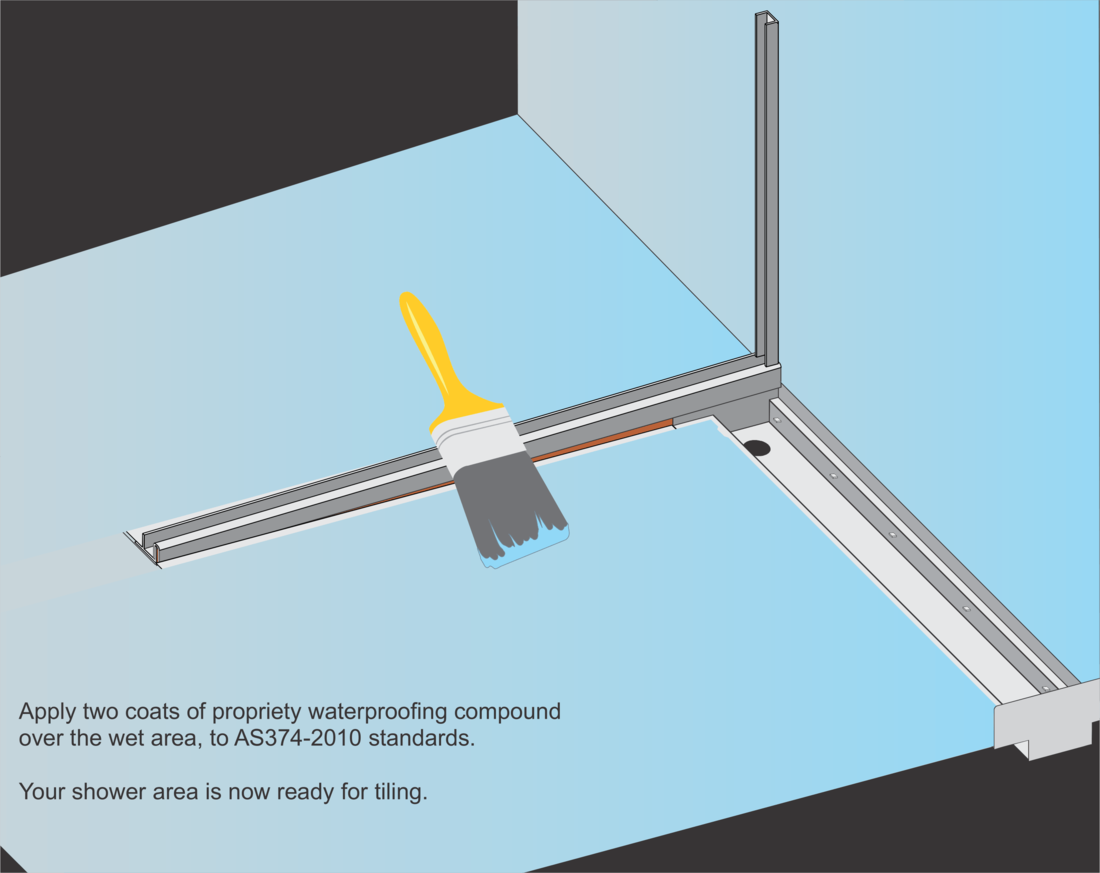
Step 10
Apply two coats of propriety waterproofing compound over the wet area, to AS374-2010 standards.
Your shower area is now ready for tiling.
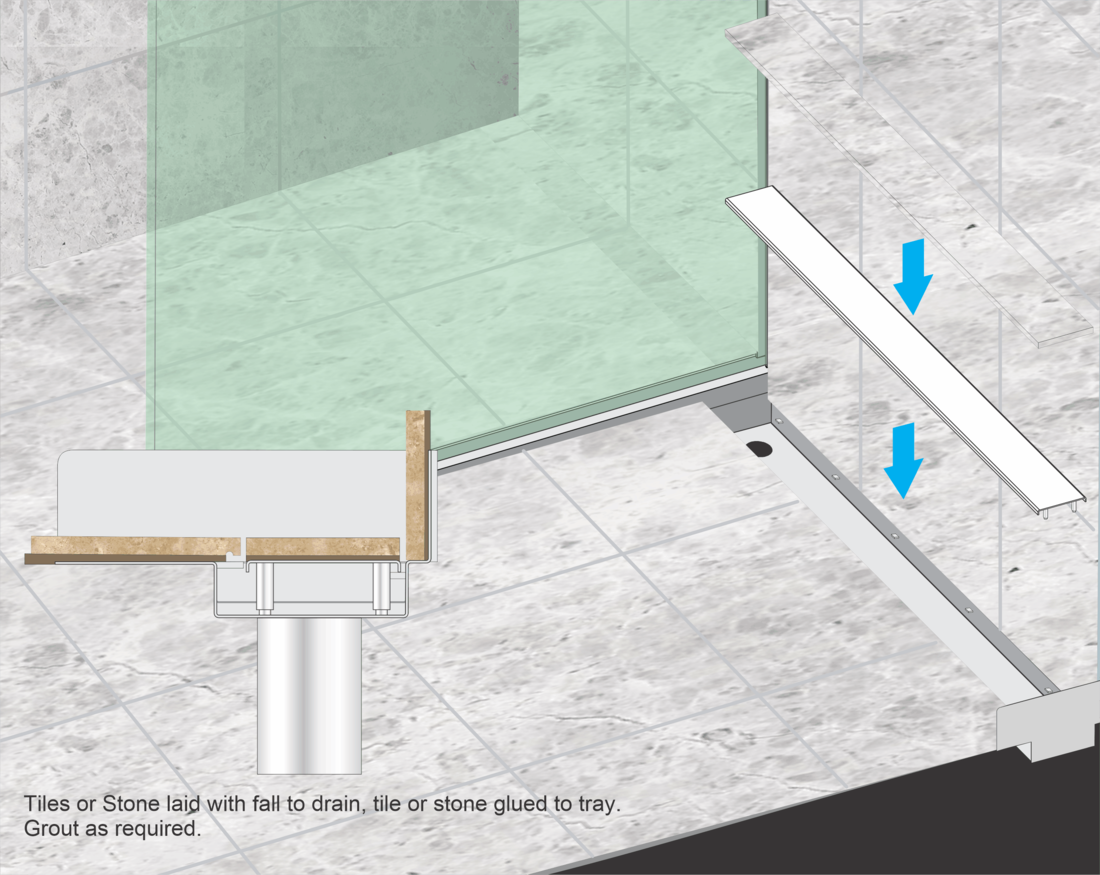
Step 11
Tiles or stone laid with fall to drain, tile or stone glued to the tray. Grout as required.
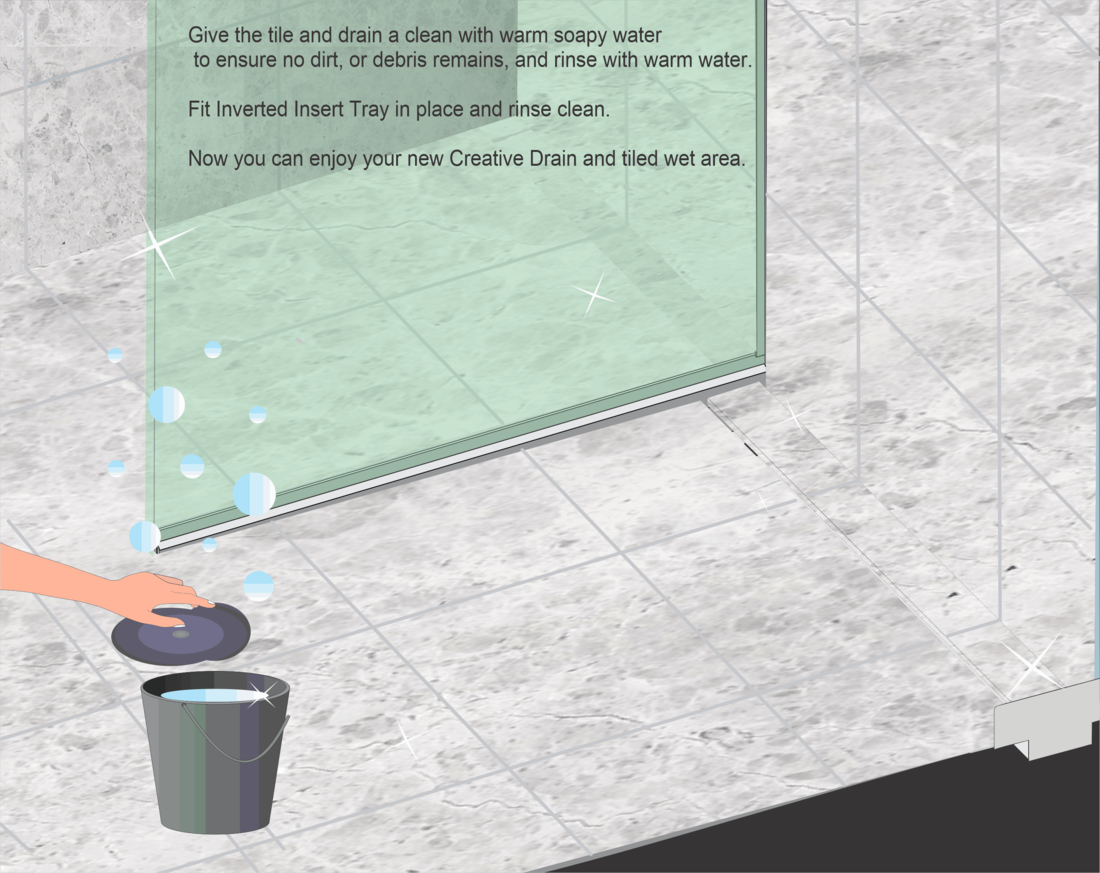
Step 12
Give the tile and drain a clean with warm soapy water to ensure no dirt or debris remains and rinse with warm water. Fit Inverted Insert Tray in place and rinse clean.
Now you can enjoy your Creative Drain and tiled wet area.